Maximizing Outdoor Living: Durable Design Ideas to Elevate Your Home’s Value and Enjoyment
The Ultimate Guide to Drywall Installation: From Framing to Finishing
Drywall installation is the backbone of smooth, professional-looking walls and ceilings in any home renovation, basement finish, or remodeling project. While it might seem straightforward, mastering the process—from framing checks to the final skim coat—is crucial for avoiding cracks, bulges, or uneven surfaces that plague amateur jobs. For DIY enthusiasts, understanding these steps saves money and ensures structural integrity. Property owners benefit from increased home value and noise reduction, while homeowners gain peace of mind knowing their walls are durable and ready for paint. This guide breaks down the drywall journey into actionable steps, empowering you to achieve results that rival the pros.
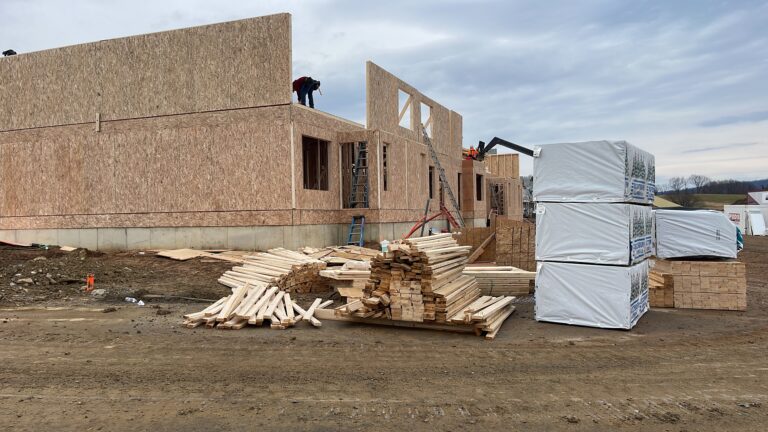
Pre-Installation: Framing Inspection and Material Prep
Before hanging a single sheet, inspect your framing. Studs and joists must be straight, properly spaced (16″ on center is standard), and flush. Use a level to identify warped boards—shim or replace them. Check for protruding nails or screws that could create bumps. Next, gather materials:
- Drywall sheets: Choose ½” for walls, ⅝” for ceilings or fire-rated areas.
- Fasteners: Coarse-thread drywall screws (1¼” for walls, 1⅝” for ceilings).
- Joint compound: All-purpose for embedding tape, lightweight for top coats.
- Tools: Drywall lift (for ceilings), utility knife, T-square, screw gun with depth setting.
Measure room dimensions to minimize seams—plan sheets so joints land on framing. Acclimate drywall indoors for 48 hours to prevent expansion issues.
Hanging Drywall: Cutting, Fastening, and Seam Strategy
Start with ceilings, then walls. Score drywall with a utility knife using a T-square, snap the board, and cut the paper backing. Lift sheets tight to the framing, ensuring edges break on stud centers—never float edges between joists. Stagger horizontal seams like brickwork to avoid weak lines. Drive screws every 12″ on ceilings, 16″ on walls, sinking them just below the surface without tearing the paper. Keep screws ⅜” from edges to prevent blowouts. Around outlets, measure carefully and cut holes with a keyhole saw. Tip: Rent a drywall lift for ceilings—it’s safer and ensures tight, even installation.
Taping and Coating: The Art of Invisible Seams
Seamless joints require three precise coats. First, apply a thin layer of all-purpose joint compound over each seam. Embed paper tape (or fiberglass mesh for small repairs) into the mud, smoothing it with a 6″ taping knife to remove bubbles. Let this dry completely—rushing causes cracks. For the second coat, use a 10″ knife to feather compound 6–8″ beyond the tape edges, filling the depression. After drying, lightly sand ridges. The third “skim coat” uses lightweight compound applied with a 12″ knife, extending 12–18″ wide. This gradual feathering blends seams into the wall. Pro tip: Shine a sidelight across joints to spot imperfections before sanding.
Sanding and Final Prep: Achieving a Paint-Ready Surface
Sanding is messy but critical for a smooth finish. Use 120–150 grit sandpaper on a pole sander or sponge. Work in circles, applying light pressure—over-sanding exposes tape. Focus on ridges, not slight depressions (compound shrinks as it dries). Wear a respirator and seal the room with plastic. After sanding:
- Wipe walls with a tack cloth to remove dust.
- Inspect under angled light—reapply skim coat to any visible seams or screw holes.
- Prime before painting to seal the drywall and ensure even color absorption.
Avoid “overworking” problem areas; minor flaws disappear under primer and paint.
When to Call a Professional
While DIY drywall is feasible for small patches or single rooms, complex projects demand expertise. Hire a pro for:
- High ceilings or stairwells: Lifting heavy sheets overhead is hazardous.
- Major texture matching: Replicating orange peel or knockdown requires specialized tools.
- Time constraints: Pros complete large basements or whole-house hangs 3–4x faster.
- Water-damaged walls: Hidden mold or structural issues may need assessment.
Most drywall contractors charge $2–$3 per square foot for hang and finish—worth it for flawless results.
Conclusion: Build a Foundation for Beautiful Walls
Drywall installation transforms skeletal frames into polished living spaces, but success hinges on meticulous prep, strategic hanging, and patient finishing. Remember: straight framing enables tight seams, consistent screw depth prevents “popping,” and gradual feathering hides joints. Whether tackling a basement or repairing a wall, prioritize precision over speed. Invest in quality tools like an adjustable-depth screw gun and long knives—they pay off in reduced sanding time. For ambitious projects, consult a professional to handle complex angles or textures. With these techniques, your walls will provide a flawless canvas for years of paint, memories, and home pride.