Expand with Excellence: Home Additions Crafted for Comfort and Value
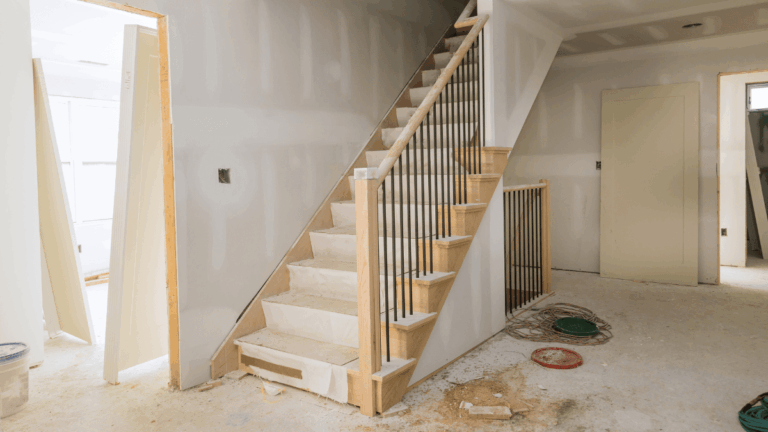
Basement Finishing: Transforming Your Underutilized Space into a Functional Haven
That dark, unfinished basement gathering dust and storage bins holds immense potential. More than just extra square footage, a finished basement represents a significant opportunity to enhance your home’s value, functionality, and enjoyment. Whether you dream of a cozy family room, a vibrant home theater, a productive home office, or a dedicated guest suite, transforming this underutilized space is a smart investment. However, finishing a basement presents unique challenges distinct from above-ground renovations. Moisture control, proper insulation, code compliance, and low-ceiling strategies are critical considerations. This guide dives into the essential steps and professional insights needed to navigate your basement finishing project successfully, ensuring your new space is not only beautiful but also dry, warm, durable, and built to last.
Laying the Groundwork: Planning and Moisture Mitigation
Success starts long before the first stud goes up. Begin by defining the basement’s purpose – this dictates layout, lighting, and utility needs. Check local building codes for egress requirements (safe exit windows for bedrooms) and permit necessities. Critically, address moisture. Basements are inherently prone to dampness, and finishing over unresolved water issues invites mold and damage. Conduct a simple test: tape a 2’x2′ plastic sheet tightly to the floor and another to a foundation wall. Check after 48 hours. Condensation on top indicates high humidity (solved with dehumidification), while moisture underneath signals seepage needing professional intervention. Ensure exterior grading slopes away from the foundation, extend downspouts, and seal foundation cracks with hydraulic cement. Installing a vapor barrier (like 10-mil plastic) over the floor before framing and using perimeter drain systems if needed creates a crucial moisture block.
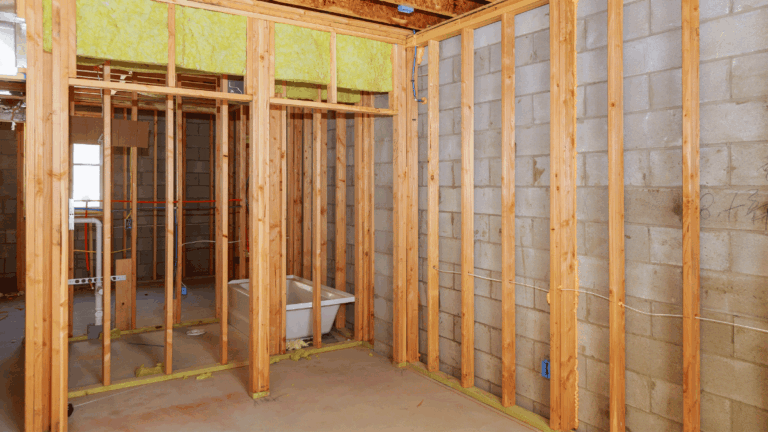
Building the Bones: Smart Framing and Effective Insulation
Framing creates your basement’s rooms and supports walls and ceilings. Use pressure-treated lumber for the bottom plate in direct contact with concrete to prevent rot. Standard framing follows, but consider these basement-specific tactics:
- Furring Strips vs. Full Stud Walls: For very tight spaces, furring strips attached directly to foundation walls save inches but offer less room for insulation and utilities. Full stud walls, built 1-2 inches away from the foundation, are preferred for better insulation and wiring.
- Insulation is Paramount: Basements need robust insulation for comfort and energy efficiency. Rigid foam board insulation (XPS or EPS) is ideal against foundation walls due to its high R-value per inch and moisture resistance. Install it snugly between studs or directly against the foundation before framing. Spray foam offers superior air sealing but comes at a higher cost. Always insulate rim joists (the band joist where the floor meets the foundation) with spray foam or cut rigid foam, as this is a major heat loss area.
Enclosing the Space: Drywall Installation and Painting Strategies
With framing and insulation complete, it’s time to enclose. Moisture-resistant drywall (green board or Type X) is mandatory for basements, especially on exterior walls and ceilings. Hang it horizontally for fewer seams and better rigidity. Use moisture-resistant joint compound for taping and bedding. Pay extra attention to sealing seams thoroughly to minimize air infiltration. Before painting, prime all surfaces with a high-quality, stain-blocking primer specifically designed for basements or masonry contact. This seals the drywall, prevents moisture stains from bleeding through, and ensures even topcoat adhesion. Choose mildew-resistant paints in satin or eggshell finishes for walls – these are more durable and easier to clean in a basement environment than flat paints.
Overhead Considerations: Navigating Ductwork, Pipes, and Low Ceilings
Basement ceilings are often a jungle of ductwork, plumbing, and electrical lines. How you handle this impacts both aesthetics and headroom:
- Drop Ceilings (Acoustic Tiles): Excellent for accessibility to utilities. Modern options are more attractive than older styles. They do sacrifice some height.
- Drywall Ceilings: Provide a clean, finished look and maximize ceiling height where possible. Requires meticulous planning for access panels near shutoff valves or critical junctions.
- Strategic Soffits/Bulkheads: Box in unavoidable low-hanging pipes or ducts. Design them intentionally as architectural features rather than just hiding spots. Painting soffits the same color as the ceiling helps them recede visually.
- Embrace the Industrial Look: Painting pipes, ducts, and the ceiling structure a uniform dark color (like charcoal or black) can create an intentional, modern industrial aesthetic without losing height.
Choosing the Right Floor: Comfort, Moisture, and Durability
Basement flooring must prioritize moisture resistance and comfort. Avoid solid hardwood, as it can warp. Top choices include:
- Engineered Vinyl Plank (EVP/LVP): Waterproof, durable, comfortable underfoot, and available in realistic wood/stone looks. A floating installation over a dimpled underlayment allows moisture vapor to escape upwards.
- Ceramic/Porcelain Tile: Highly water-resistant and durable. Use a crack-isolation membrane beneath to prevent cracks from transferring from the slab. Can feel cold; pair with radiant floor heating or area rugs.
- Interlocking Rubber Tiles: Ideal for gyms or playrooms – cushioned, waterproof, and easy to install.
- Proper Subfloor: For carpet or laminate, never install directly on concrete. Use a dimpled plastic underlayment (like DriCore) to create an air gap, protecting the flooring from slab moisture and adding insulation.
Finishing your basement is a substantial project, but the reward is a transformative addition to your home. By meticulously addressing moisture at the outset, employing proper framing and insulation techniques, carefully installing moisture-resistant drywall and paint, strategically managing overhead utilities, and selecting appropriate flooring, you create a space built for longevity and comfort. Remember, consulting professionals for critical steps like major moisture remediation, complex electrical, or HVAC modifications is a wise investment. With thoughtful planning and attention to these basement-specific details, your once-forgotten lower level can become your home’s most cherished and functional haven, adding significant value and enjoyment for years to come. Start by clearly defining your vision and tackling that moisture test – your dream basement awaits!