Elevate Your Home’s Value: Crafting Custom Home Additions for Modern Living
Unlock Your Home’s Potential: A Professional Guide to Basement Finishing
That cavernous, underutilized space beneath your home holds incredible potential. Far too often, basements become neglected storage catch-alls, damp and dimly lit. But envision a vibrant home theater, a productive home office, a lively guest suite, or a dedicated playroom. Finishing your basement isn’t just about adding square footage; it’s about significantly increasing your home’s value, functionality, and enjoyment. For homeowners and DIY enthusiasts alike, transforming this foundational space represents one of the most cost-effective ways to expand living areas without the expense and complexity of an addition. However, basement finishing presents unique challenges – moisture management, low ceilings, and egress requirements – demanding careful planning and execution. This guide walks you through the critical steps, blending professional expertise with practical insights to help you create a warm, dry, and truly livable oasis below grade.
Laying the Foundation: Strategic Planning & Design
Success begins long before the first tool is picked up. Start by defining the primary purpose of your finished basement. Will it be an entertainment hub, a quiet retreat, or a multi-functional space? This decision dictates layout, lighting, electrical needs, and even plumbing rough-ins. Next, obtain necessary permits – local building codes govern crucial aspects like ceiling height (typically 7 feet minimum), emergency egress windows, and stair specifications. Neglecting permits risks safety hazards and costly rework. Measure meticulously, noting obstructions like support columns, ductwork, and plumbing stacks. Create a scaled floor plan, allocating zones for different activities. Consider future needs: pre-wiring for surround sound, adding a bathroom rough-in, or reinforcing floors for heavy equipment. This planning phase prevents expensive mid-project changes and ensures your vision complies with regulations.
Conquering Moisture: The Non-Negotiable First Step
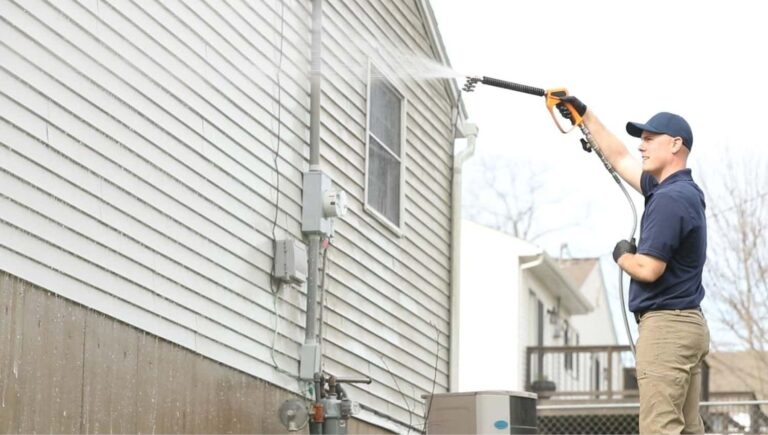
Water is the basement’s arch-nemesis. Ignoring moisture guarantees failure and costly damage. Address existing issues aggressively before framing or insulation. Start outside: ensure downspouts extend at least 6 feet away from the foundation and the ground slopes away from your house. Inside, conduct a thorough assessment:
- Check for active leaks or seepage: Tape plastic sheeting (approx. 2’x2′) to concrete walls and floors. Check after 24-48 hours for condensation (indicating high humidity) or water droplets (indicating liquid intrusion).
- Evaluate humidity levels: Use a hygrometer; consistently above 50-60% RH requires a dehumidification strategy.
Solutions vary based on severity. For minor dampness, applying a high-quality concrete waterproofing sealant (like epoxy or urethane-based) to walls and floors creates a barrier. For active seepage or hydrostatic pressure, installing an interior drainage system (French drain) connected to a sump pump is often essential. Always install a robust vapor barrier (minimum 6-mil polyethylene) over the floor and up the walls before framing. This crucial layer prevents ground moisture from migrating into your finished space.
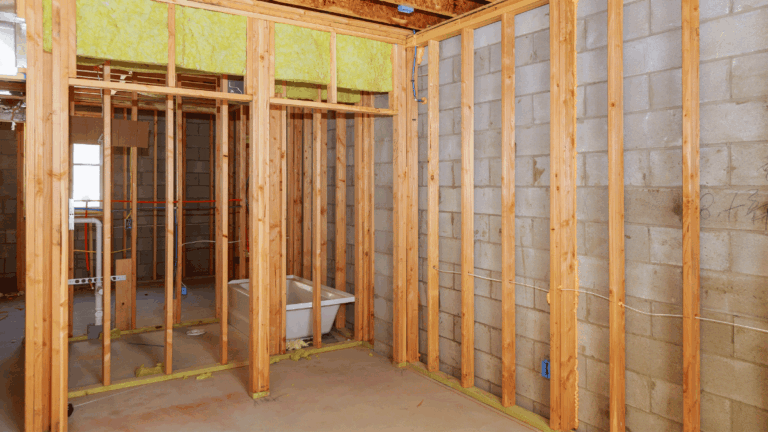
Building the Envelope: Framing & Insulation for Comfort
Creating a comfortable, energy-efficient space requires proper framing and insulation. Use pressure-treated lumber for the bottom plate of any wall touching concrete to prevent rot. Standard framing (2×4 studs, 16″ on center) is common, but consider metal studs if moisture concerns persist. Leave a 1/2-inch gap between framing and concrete walls to allow for minor moisture movement and facilitate insulation placement. Insulation is paramount:
- Walls: Use rigid foam board insulation (XPS or EPS) directly against the concrete foundation. It provides high R-value and acts as a secondary vapor barrier. Frame the wall in front of it, then add fiberglass or mineral wool batts within the stud cavities.
- Rim Joists (Band Joists): These areas are major heat loss points. Seal gaps with spray foam and cut rigid foam to fit snugly, sealing edges with canned foam.
- Floors: While insulating basement floors is optional for comfort, installing rigid foam under subflooring panels significantly reduces cold feet. Ensure any subfloor system allows for airflow.
Prioritize air sealing around penetrations (wires, pipes) with spray foam to prevent drafts and moisture-laden air infiltration.
Crafting the Canvas: Drywall Installation & Painting
Drywall transforms framed walls into smooth surfaces. In basements, moisture-resistant drywall (green board or Type X) is mandatory, especially on exterior walls and ceilings below plumbing. Hang sheets horizontally, staggering end joints between rows. Use appropriate drywall screws (avoid nails) driven slightly below the surface without tearing the paper. Taping and mudding require patience:
- Apply fiberglass mesh tape over seams and corners.
- Use setting-type compound (hot mud) for the first two coats for strength and faster drying.
- Finish with a lightweight joint compound for the final coats, sanding smoothly between coats.
Prime all surfaces with a stain-blocking, mold-inhibiting primer before painting. This seals the drywall, prevents moisture stains from bleeding through, and provides a uniform base. Choose high-quality acrylic latex paint formulated for interior use. Satin or eggshell finishes are durable and easier to clean than flat, making them ideal for basement walls.
Flooring Choices: Balancing Durability and Comfort
Basement floors demand resilience against potential moisture and temperature fluctuations. Avoid solid hardwood, which can warp. Top choices include:
- Engineered Vinyl Plank (EVP/LVP): Waterproof, durable, comfortable underfoot, and available in realistic wood/stone looks. Can often be installed directly over concrete with a vapor barrier underlayment.
- Ceramic or Porcelain Tile: Highly water-resistant and durable. Requires a properly prepared, level concrete subfloor and professional installation for best results. Can feel cold; consider radiant heating mats.
- Interlocking Rubber or Foam Tiles: Excellent for playrooms or gyms – cushioned, water-resistant, and easy to install.
- Stained/Polished Concrete: A modern, low-maintenance option if your slab is in good condition. Requires professional sealing.
Proper subfloor preparation is critical. Ensure the concrete is clean, dry, and level. Use a dimpled plastic underlayment beneath non-floating floors to create an air gap, preventing moisture wicking.
Elevate Your Home: The Value of a Finished Basement
Transforming your basement from a neglected void into a vibrant, functional living space is a powerful investment. By meticulously planning your layout, ruthlessly addressing moisture at its source, building a well-insulated and sealed envelope, expertly finishing walls and ceilings, and selecting resilient flooring, you create more than just extra rooms – you create value, comfort, and new possibilities for your home life. While ambitious DIYers can tackle many aspects, don’t hesitate to consult or hire professionals for critical tasks like major waterproofing, complex electrical work, or HVAC modifications to ensure safety and code compliance. Start by thoroughly assessing your basement’s condition, defining your dream space, and gathering the necessary permits. With careful execution of each step outlined here, your underground oasis awaits, ready to enhance your daily living and significantly boost your property’s worth for years to come.